Before you can program the ESP8266, you need to wire it up.
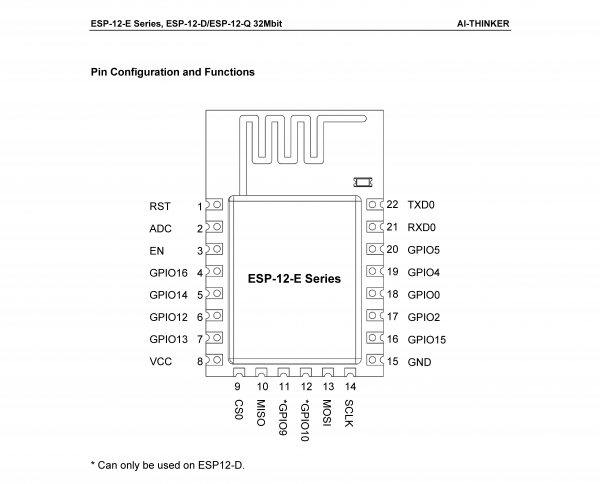
First things first, the ESP8266 uses a 2mm pin spacing so you can’t use a standard breadboard as these use a 0.1 inch spacing. It also uses 3.3V logic, so you need to use a 3.3V serial adaptor or a 5V one with a level shifter.
Ideally, you will need the following things:
- USB to 3.3V TTL serial adaptor (I use an FTDI TTL-232R-3V3)
- ESP8266
- 3.3v DC supply (capable of providing ~400mA)
- Small SPST switch – Optional to switch between Run/Program mode
- Momentary push button – Optional reset button
- 4 x ~10k resistors
- ~100nF capacitor
I wired up my ESP8266 like this (Source: https://github.com/esp8266/Arduino/blob/master/doc/boards.md#improved-stability)
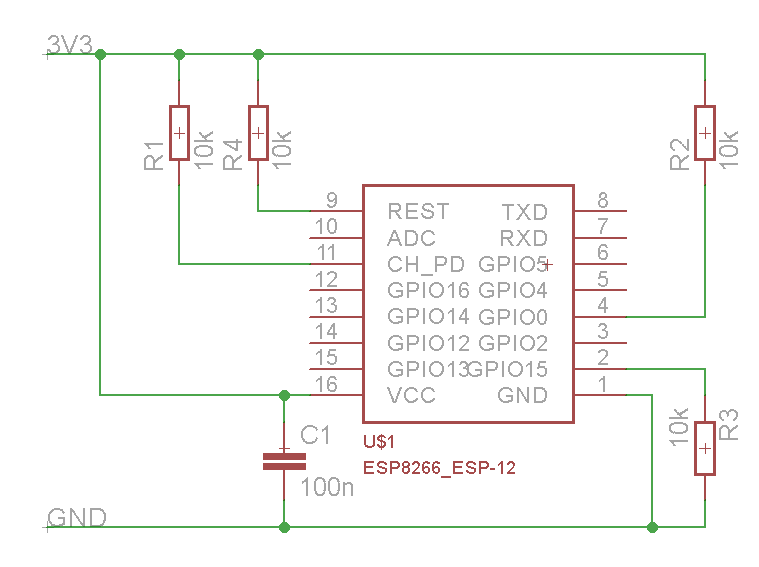
As well as the above diagram, you can connect the momentary push button to pull the reset (REST or RST) pin low and the small switch to pull GPIO0 low. When GPIO0 is pulled high, the saved program will run on power up. If GPIO0 is pulled low, the ESP8266 will be in program mode. If you ever find that your new program runs after upload, but won’t run after reset, check the state of GPIO0.
You will also need to connect TXD,RXD and GND from the USB to serial adaptor to TXD,RXD and GND on the ESP8266.
With regard to the 3.3V supply, I generally use a 5V supply and drop it down to 3.3v with a regulator such as an LD33V or an LD1117V33.
Once the ESP8266 is powered up, it can now be programmed from the Arduino IDE.
Here are a couple of tips for programming in the Arduino IDE:
- Some USB to serial adaptors are labelled incorrectly, try connecting TXD-RXD and RXD-TXD if the ESP8266 does not respond
- Remember that GPIO0 needs to be pulled low when you are programming it
- If the IDE is unable to upload to the ESP8266, try resetting it (Briefly pull RST pin low) when the compile step is about 80-90% complete